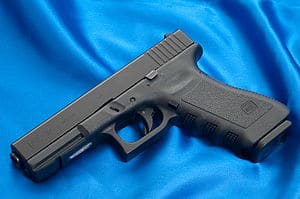
Though not commonly discussed, rebluing a gun is an important process for maintaining your firearm’s look and utility.
By rebluing your weapon, you can ensure that it maintains a superior look and feel without sacrificing functionality or safety.
While rebluing can be done professionally, and perhaps should be for some more expensive guns, you can reblue your weapon at home.
Doing so will take a thorough understanding of the rebluing process so that you remain safe and do a good job.
In this guide, we’ll go over everything you need to know about rebluing your gun, giving you the tools you need to get your gun back in tip-top shape.
Let’s dive right in and start off with an important question!
What Is Gun Bluing?
Bluing or black oxidizing is basically a way of treating the steel through which it creates a thin protective shell type of layer around it.
The method used works by converting the red iron oxide (or rust, Fe2O3) into the black iron oxide (Fe3O4).
The name of the process “bluing” is given due to the blue-black look that is achieved as a result.
The process of bluing a metal can be used on any kind of sheet metal. However, it is particularly more common for gun barrels and other components of the different types of firearms.
Best Gun Bluing Kits
I have been working around with many gun bluing kits for years.
Believe me, it wasn’t easy for me to find the best match! And I had to try various different brands, spending lots of money into these bluing kits, before I found the best ones that are good to use.
If you are looking for a most efficient bluing kit for your guns, and do not want to do a whole lot of research to find the best kit on the market, you are lucky here.
I have already completed the harder part for you by researching and reviewing below the best bluing kits for your money.
Check them out and do not forget to read about the buying tips that I have mentioned just after the reviews, so that you will not end up buying the kit that you will not need.
1- Birchwood Casey Super Blue
Birchwood Casey Super Blue - Liquid Gun Blue Solution Birchwood Casey Super Blue - Liquid Gun Blue SolutionThe Birchwood Casey Super Blue comes in a 3 fl oz plastic bottle and is one of the best and most affordable gun bluing solution available online.
The quantity is good enough for your gun and can easily last for a few months even when you use it on a regular basis.
This best cold gun bluing kit works perfectly fine for all the gun materials no matter it’s your stainless-steel gun or gunmetal.
In fact, you will be going to get pretty good results on any kind of material if you follow the bluing instructions well (refer instructions manual provided).
You can use a scrubber (made of wool or cotton) to apply this blue agent and then use steel wool for buffing your gun.
Unlike other ordinary gun blues, you will not need to apply the Birchwood Casey Super Blue over and over again. In just 2-3 rubs you can get the fine finishing you are looking at.
Overall, with this gun blue solution, you can get the sparkling or matte finish on your firearm without any issues.
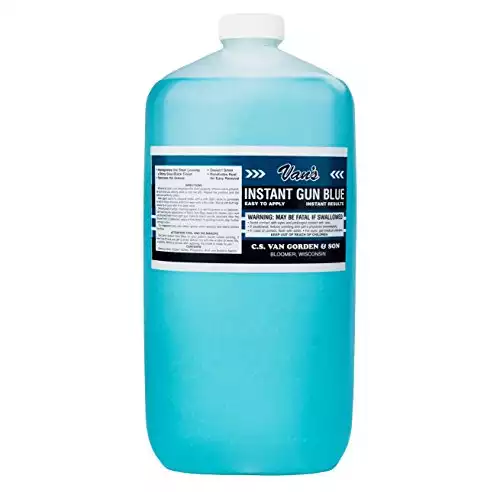
2- Van’s Gun Blue 32oz Bottle Solution
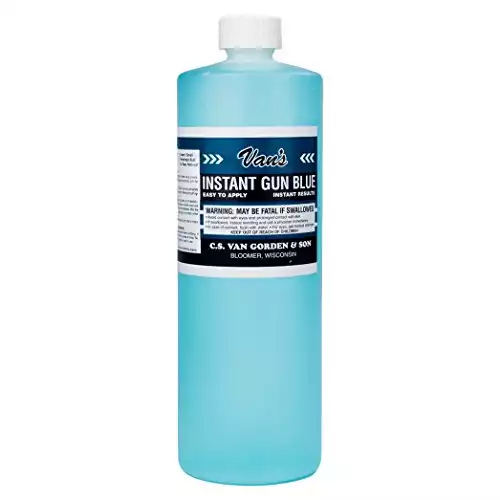
The Van’s gun blue is available in a 32 oz bottle. Unlike other bluing solutions, this gun bluing repair kit is best suitable for metals like iron and steel due to the fact that it can penetrate through the steel.
The good thing about this gun blue is its ability to blend completely with the original color of the gun. In a few cases, it may look darker but the finishing you notice on your gun will be remarkable.
The thing you need to keep in mind is to degrease the gun parts before bluing. Also, you will need to re-polish your firearm at least 2-3 times to get good output. You will not be going to get good shine with just one polish.
Worry not, polishing it 2-3 times will not spend up all your bottle. It only requires one fourth the quantity to blue. Rest you can use for bluing over months.
Applying this solution is pretty easy – you can make use of steel cotton or an ordinary towel if you do not have steel cotton available.
3- Brownell Oxpho-Blue Professional Grade Cold Blue
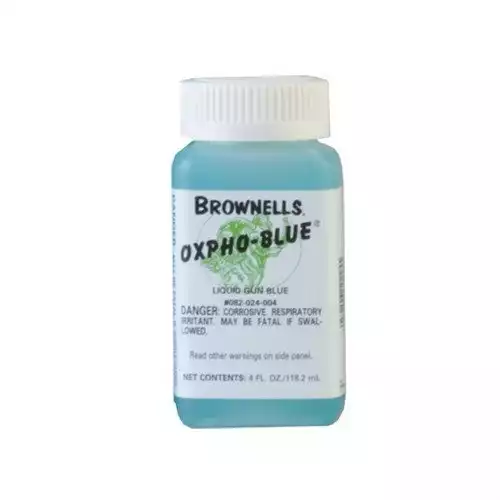
Oxpho-Blue Professional Grade Cold Blue by Brownell is ideal for getting great finish over your gun surface.
Based on the finish you already have on your gun you can either get a glossy or a matte finish. Means if you have a polished steel surface you will be getting a nice glossy look. However, if it’s a sanded surface the matte finish you will be getting is highly appealing.
While using this best cold gun bluing kit do note that it’s a kind of stuff that is best suited for touch-ups. Also, it can damage the quality of material if its cast iron. So, avoid using it on a gun surface if its other than steel.
This can also be used as the best hot bluing kit and the results you will be getting will just be awesome. The fine matte bluing you get after applying can even be improved better by dousing it in oil. This will make the bluing get darker and look nicer than before.
After having tried this Oxpho-Blue many times, I found that its also great stuff for getting an aluminum black touch-up. Just bead blast the slide and frame of your gun and apply it to get the great looks.
4- Birchwood Casey Perma Blue Liquid Gun Blue Finishing Kit
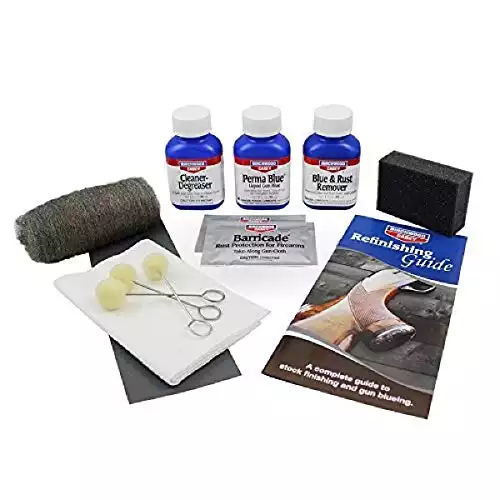
Birchwood Casey liquid kit for gun bluing is best for beginners who want to try their hands out on bluing.
The package comes with all the essential components like 3 oz Perma Blue liquid gun blue, 3 oz blue and rust remover, 3 oz cleaner-degreaser, bluing applicators, steel wool pads, gun wipes, sponge and a service cloth.
Along with there is an easy-to-follow refinishing guide that helps you avoid doing the mistakes when bluing. As a beginner, you can get all the step-by-step bluing instructions here in this manual guide book.
While using this kit, do remember that applying multiple coats is essential. Depending on the condition and metallic look you desire to have, you may need to apply 20-40 coats of bluing liquids.
The process of applying the liquids multiple times may seem to be time consuming, but believe me the end results you will be getting will be quite pleasing.
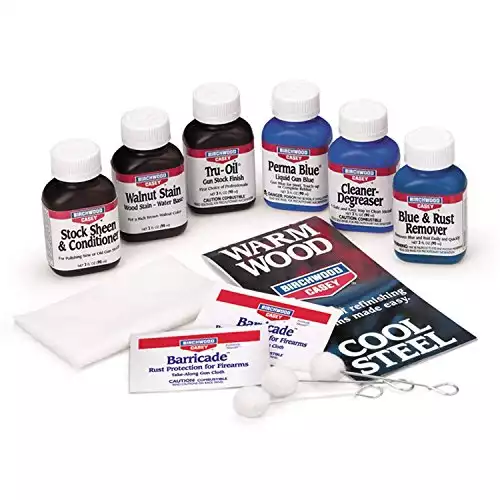
5- BIRCHWOOD CASEY Deluxe Perma Blue & Tru-Oil Complete Finishing Kit
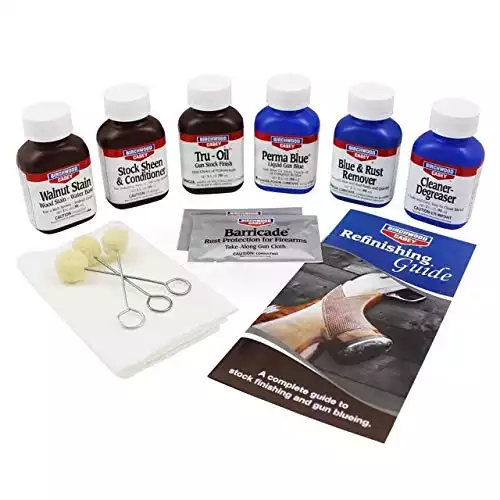
The Birchwood Casey Complete Gun Finishing Kit is again the best gun bluing kit for beginners as it contains lots of additional components.
The kit comes with a walnut stain, a degreaser/cleaner, rust, and blue remover, a stock conditioner, a tru-oil gun stock finish, and even cloth and sponge.
If you are new to bluing your guns, this kit will prove to be extremely useful for you. And the good thing is with this kit at home for easy gun bluing, you need not purchase any other stuff separately.
Since it contains all the materials for removing rust and stock refinishing you will also find this useful when removing the rust from your gun parts and for finishing the gun-stock.
While using the cleaner in this kit, you need to be a bit careful. Ensure that before you use the bluing liquids, you have wiped away the leftover cleaner completely.
If there is a cleaner left it may interact with bluing liquid and may not provide you the intended finishing.
What type of finishing will I get with bluing kits?
Most of the bluing kits will provide glossy or a semi-gloss finish. Some of them however can also provide matte finish. It usually depends on how you use and apply the solution in the kit and the coats you apply on the surface.
Can a gun bluing kit I use provide black finishing?
Most of the kits in the market will provide blue finishing, provided you follow the instructions carefully. If not some of the kits may also provide the black finishing which is most of the times undesirable.
Can I use the bluing kits work for all types of guns?
Yes, the bluing kits I have mentioned here in the list can successfully blue all the guns irrelevant of their sizes and types. In fact, if you know how to use them correctly these can also be used to blue cast iron surfaces on your old guns.
However, keep in mind that not all the kits are good for bluing stainless steel and aluminium. You may need to check with the manufacturer to know which are compatible with these materials.
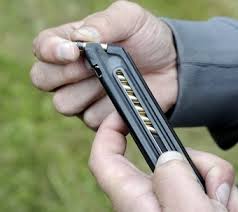
How to Use A Gun Bluing Kit?
Using a gun bluing kit correctly is no rocket science. No matter you are using a Birchwood or Brownell’s bluing kit the steps you need to follow are generally the same. The common steps you need to follow when using these best gun bluing kits are:
- Remove the already present
- Polish the metal to remove the scratches
- Clean the metal with cleaning oil and solvent
- Heat the metal using a blow dryer, a torch or a heat gun
- Apply the bluing fluid properly. Polish in few layers as instructed in the kit
For more details, you can check the video below. Also, check the detailed steps for cold and hot bluing methods as I have discussed later in this article.
Things to Look At When Buying
Before you pick the best gun bluing kit from the list its important to monitor the age of your gun, its condition, its overall monetary value and the results you are trying to achieve.
This will help you decide what and how much you will need to invest in a bluing kit.
Few important factors you need to look for are:
1- The present bluing condition
If your firearm still has its original bluing in place its good to rely on the cold bluing process. This can work even if there are some minor dents or scratches on the surface.
However, if you find the original bluing worn out, its good to go for hot bluing for getting better results.
The cost to hot blue a gun on a professional level will generally depend on the type of firearm you want to blue and the finish you want to have.
2- The bluing supplies you have
If you want to have a better long-lasting result it’s good to get a complete kit rather than just a bluing solution. Especially if you are a beginner, investing in a complete kit makes a sense.
With a complete gun bluing package, you can work pretty fast and easy to complete the bluing process.
If, however, you already have some bluing components, you can go and pick the bluing fluid rather than investing in a complete package.
3- The kind of gun you want to blue
As mentioned before, you should necessarily check the monetary value of your gun before bluing your gun at home. If the gun you own is not a collectible you can buy the best cold bluing kit to use at home for bluing.
However, if it’s a collectible, I don’t recommend trying your hands at home. It’s best to reach out to a professional gun bluing service near you to get the bluing done at a professional level.
Finally, not all bluing kits provide long-lasting results. Therefore, before you buy any, make sure to check out how long the bluing effect will last after you have applied it to your gun.
You of course want them to last longer, so invest in a kit that will last longer and is available at a cheaper price.
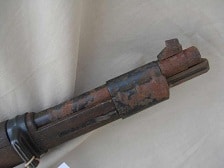
Why Should You Reblue Your Gun?
So, why exactly should you reblue a gun? Is it really that important?
The truth of the matter is that it’s up to you.
When you bought your gun, it came with a thin coat of iron oxide; this chemical gave your gun that sleek, professional feel and look that likely attracted your attention.
Over time, however, this coating can fade, which ultimately leads to gun rust. Without rebluing your firearm, you’ll find that it begins to lose its luster and can rust in a hurry.
Instead of buying a new firearm, which can be expensive, you can always reblue your gun instead.
This also helps you restore guns that have sentimental value.
Let’s face it: there’s nothing quite like your favorite gun—even a fancy new one.
For this reason, understanding how to reblue your gun will allow you to keep your guns longer. This is perfect for individuals who don’t wish to give up their guns due to strong attachment.
Of course, you may also plan on maintaining your gun’s monetary value.
Here’s the deal: if you let your gun rust without taking action to correct it, it will lose its value—and a lot of it.
As such, you’ll want to be sure that you are doing everything you can to take care of your gun’s appearance.
By rebluing your gun, you can help prevent gun rust that will ultimately make it harder to maintain your gun’s value down the road.
Another important reason you’ll want to reblue your firearm (perhaps the most important one of all) is that you want to make sure that you are retaining your gun’s functionality.
The truth of the matter is that it’s not quite as easy to handle your weapon when it’s rusted and potentially doesn’t fire right.
Knowing this, you’ll want to do what’s necessary to make sure that your gun is working optimally at all times.
This is crucial to your safety and the safety of all who happen to handle your weapon.
Knowing all of this, we’ll take an in-depth look at the three best ways to reblue your gun in the next section!
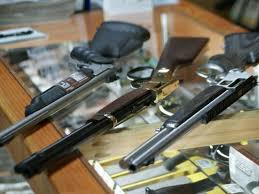
3 Ways To Reblue A Gun or Gun Parts
Rebluing a gun can be easier than you think.
Below, we’ll go over the three most common ways firearm owners reblue their weapons to help secure firearm longevity and aesthetics.
1- Cold Bluing
Let’s start with the simplest of all bluing techniques.
If your gun has only just started to lose its bluing, you’ll find that the easiest and most appropriate way to correct the problem is by using a cold bluing kit.
These kits are designed for guns that do not have extensive damage to the existing bluing.
Because they are designed for guns with minimal damage,
Keep in mind, however, that they are also the least durable, meaning you may find yourself having to repeat the process sooner than if you had chosen the other two options.
So how to cold blue your gun?
It’s actually simpler than you may think. Let’s go over the proper method, step-by-step, so you can make sure you get it right the first time.
1- Remove Old Bluing (Optional)
You’ll want to start by judging the state of your bluing. If you think it’s too damaged, you may decide to go ahead and remove it entirely.
For many cold bluing projects, however, you’ll likely find that the majority of your bluing will remain intact.
To remove your bluing, you’ll want to use specific chemicals, such as (which is actually an automotive rust remover made from a phosphoric acid).
Or you can use white vinegar, which possesses acetic acid that will naturally remove your bluing.
2- Polish Gun Metal
Using either 600 to 1200-grit sandpaper or 000 steel wool, gently polish the gun metal to remove any blemishes, scratches, or rust.
This will help to give your gun back its natural shine.
3- Clean the Metal
If you’re simply looking to enhance your current bluing, simply apply cleaning oil to the locations you wish to blue.
This will help to remove the old bluing completely. When you are done, go over the spots with acetone to make sure you remove all of the cleaning solutions.
If you wish to clean the entire gun, however, you’ll find it easier to simply put the entire gun into a cleaning solution. Consider using sodium triphosphate or denatured alcohol.
4- Heat the Metal
Heating the metal before applying the bluing solution can help the gun soak in the material better and keep it longer.
For this reason, consider leaving your gun out in the sun for several hours, heating it with a heat gun, or using a blow dryer to prep the gun for bluing.
5- Apply the Solution
Using a clean applicator, begin to gently apply the solution to the area you wish to be blued.
Instead of applying it broadly over large areas, make sure to apply it in a single swipe and then use a piece of steel wool to even it out.
This will keep your coat smooth and polished looking.
Make sure to keep these tips in mind: use a cotton T-shirt for large area applications and a cotton ball or swab for smaller areas.
Additionally, remember that you can soak screws and other hard-to-blue items in the solution.
Do not simply apply the bluing solution once. For a proper finish, you’ll likely need to apply it around seven times, using a new piece of steel wool to smooth out every new layer.
You want to end up with a dark-blue finish. If you do not, you may find you have to go back to the beginning to sand out any rough patches in your gun.
6- Top with Gun Oil
To finish, apply a coat of gun oil and then wait for a few hours. Then, using a cotton ball, remove the oil and apply again.
Repeat the process every few hours to provide your gun with the ultimate finish.
If you are wondering what works better between – painting a gun and cold bluing – let me tell you that cold bluing method is generally much better than epoxy-based special spray paints.
However, if you are looking to save a few bucks then painting can be a good alternative.
2- Hot Bluing
When compared to cold bluing, hot bluing involves a bit more patience—and tougher work.
Despite this, you’ll find that it works better for guns that have lost significant amounts of their bluing.
What’s more, guns that are treated with the hot bluing process tend to hold up longer, so you’ll definitely want to consider giving this a shot depending on the state of your firearm.
1- Polish Bluing Location
Using the same sandpaper or steel wool you would use for cold bluing, begin by polishing every location you wish to blue.
2- Prepare Gun for Dipping
Doing this step correctly will help you later when you clean your gun and apply the bluing solution.
Start by threading a soft wire through the barrel of your gun and putting the small parts of your gun into a wire basket.
This will substantially simplify later steps when you need to dip your parts into the bluing solution.
Later, when you move your parts from the cleaning solution to your bluing solution, you’ll thank yourself for going ahead and getting your parts prepared.
3- Dip into Cleaning Solution
Using an appropriate solution (like any of the ones described in the cold bluing section), dip your gun into the tank and immerse it for a full ten to fifteen minutes.
As it is submerged, you want to be sure that you are wiping it so that you remove any impurities and give it a fine polish.
4- Rinse with Cold Water
Once you are done with this, rinse off for two to three minutes in cold water.
Keep in mind that if you used dishwasher detergent to rid the gun of cleaning solution, hot water is the preferred rinsing solution.
5- Dip into Bluing Solution
You’ll want to start by stirring your bluing solution.
Using Traditional Caustic Black, give the solution a solid stir to break up any salt clumps and other tough areas in the solution.
Then, you’ll want to heat it to a temperature between 275 to 311 degrees Fahrenheit.
Once you have done this, you’ll want to dip two parts: your gun barrel that you’ve wired and the basket of parts.
Be sure to dip your barrel in at an angle to let all the air escape from it. You’ll also want to move your basket around in the solution to be sure that your parts are completely covered in the solution.
You can leave your parts in the solution between fifteen or thirty minutes. Be sure to check appropriately to tell when your gun has the right amount of blue hue.
Importantly, make sure that you do not put your gun’s stainless steel parts into the bluing solution.
These should go into a separate mixture of heating chromates and nitrates.
When you are satisfied with your bluing, remove the gun parts and rinse them off thoroughly in cold water.
6- Boil Gun Parts
To remove the remainder of the bluing solution, boil your gun parts in hot water.
Consider boiling smaller parts for five to ten minutes and more complex parts for up to thirty minutes.
7- Place in Oil
As the final step, you’ll want to place your gun parts into a solution of water-displacing oil.
This solution will help cool the parts off and protect them from external elements such as sweat, rust, and body oil.
Leave in the solution between forty-five to sixty minutes.
3- Rust Bluing
Rust bluing is a simple bluing technique that will have your gun looking as good as new. Let’s take a look at how this technique is performed in the steps below.
1- Polish Bluing Location
Using the same sandpaper or steel wool as you would for the other techniques, polish all bluing locations so that they are free from impurities.
2- Clean Chemically
Clean off any excess dirt or grease with one of the aforementioned cleaners brought up in the cold bluing section.
Before doing so, check with the manufacturer to make sure that the solution is appropriate for your particular rust bluing solution.
3- Coat with Bluing Solution
Open your acid bluing solution and leave it in a closed cabinet with your gun parts for twelve hours.
Make sure the cabinet is sealed. During this time, your weapon will soak up the fumes and blue naturally.
4- Boil in Distilled Water
Once done, boil your gun parts in distilled water to halt the rusting process instigated by the acid solution.
5- Remove Red Oxide
Using a carding brush, gently remove the red oxide that has formed on top of the weapon.
Underneath will be a coat of fine black oxide. Repeat the process (starting with the acid fume bluing) as many times as desired so that you get the level of finish you are looking for.
6- Coat with Oil
After this, coat your gun parts with oil. This will protect it from rust and other unwanted elements.
Allow the oil to stay overnight before you put your gun back together.
Below is a video that can guide you on how to use gun blue for bluing a gun…
Which Gun Bluing Method To Use?
- Perform cold bluing if there is already a bluing present on your old gun
- Perform hot bluing process if you want to get the longest-lasting metal coloring effects
- Perform rust and fume bluing process in order to achieve the best protection from the rust
While working with any of the bluing processes, make sure that you do it in a well-ventilated area.
Especially when performing hot bluing process care that you stay protected from the noxious caustic salts that are being used in the process.
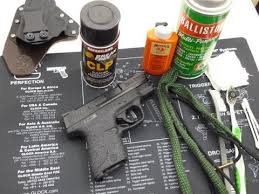
What Products Should You Use for Bluing?
Usually, I make use of Birchwood Casey Perma Blue Liquid for bluing my firearm barrels – I must say that it’s one of the best gun blue kits on the market.
This bluing solution is available on Amazon
![Birchwood Casey PERMA BLUE LIQUID Air Gun Shotgun Blueing 90ml [13125] Blue Rifle](https://takethegun.com/wp-content/uploads/51jPHRwnLyL._SL500_.webp)
It works fine for me and I believe that it’s a proven way to remove the less stubborn scratches and worn spots on rifles, shotguns, pistols, axes, and even other household items like a steel knife.
If you are seeking a quick touch-up or to completely re-blue your favorite shotgun it may work excellently.
Well, in case you do not like Birchwood Blue Liquid, you can use any other bluing solution.
For instance, there is a “Du-Lite” solution which is often good for professionals and manufacturers such as Colt or Smith and Wesson.
You can even make your own DIY gun bluing kit by using the gun bluing ingredients such as blueing salts and solutions.
However, I do not recommend this DIY method unless you are pretty sure of what you are making and how.
Whatever product you use, just make sure that you do not get that on the inside of the barrel, especially when hot bluing.
As a prevention, you can consider plugging the ends of the barrel which will ensure that no solution gets inside.
Can Bluing Remove Fingerprints On The Barrel?
In most cases, Birchwood Casey’s cold bluing kit can work great in removing all types of scratches, stains and even fingerprints that are hard to remove.
But in case if the fingerprint is etched completely into the body it may be hard to get them removed.
In case you do not find these solutions useful, you can try other alternative methods like wiping it using a ball of super fine steel wool soaked with some lubricant or oil substitutes like WD-40.
Even if it may not remove the fingerprints completely, it can work to make them less noticeable. Also, it will avoid them from reappearing back after some time.
Few Warnings and Tips when Bluing Your Rifles and Guns
While rebluing is a great way to bring extra shine and luster on your firearms, you need to be extra cautious while performing the process (the scientific term “passivation”) in order to achieve the desired results without getting any damage to parts like wooden stock.
Below are a few warning tips you may need to know;
- Before starting with the process, make sure that the gun you are bluing is unloaded
- If possible, remove the stock and gun handle from your gun
- Do not work the hot bluing method on aluminum. It can react and can be dangerous
In addition to above also, avoid the hot bluing on old double-barreled shotguns or your vintage shotguns, particularly the ones that come with any kind of soldering or are brazed with silver solder.
The Bottom Line
With the information contained in this guide, you’ll be able to get your firearm reblued in no time.
If you’ve got a weapon you wish to blue, choose one of the best gun bluing kits from the list above and follow the steps carefully to make sure you get the job done right.
In the end, you should wind up with a weapon that looks better and shinier than ever!