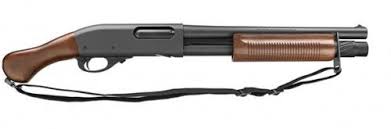
A pump-action shotgun Remington 870 is manufactured by Remington Arms Company, LLC.
It is today widely used by the general public for sports, shooting, hunting, as well as for self-defense.
It is also one of the best-used rifles by law enforcement and military organizations worldwide.
When it comes to cleaning, cleaning your Remington 870 shotgun can be pretty easy as compared to other pistols or rifles.
This is due to the fact that the barrel in Remington 870 is a smoothbore.
Also as the shotgun carries a simple design and larger tolerances you can clean it easily at home by following certain easy to understand guidelines.
Below you can find the right steps (in detail) along with the useful videos on how you can disassemble, reassemble, clean and lubricate your Remington 870.
Steps to Cleaning a Remington 870
When it comes to cleaning your Remington 870 there are 4 different steps that you’ll need to go through.
These include preparation, disassembly, cleaning, and reassembly. We’ll go through each of these steps a little bit closer right here.
Step #1: Preparation
The first step is preparation and it’s going to include a few different sub-steps to help you along.
The first thing you need to do is locate and bring together all of the tools and kits that you need to get started.
Having everything in the same spot before you start is going to make sure you’re not wandering around throughout the process.
Next, make sure that you have a clean and comfortable spot to get the work done.
You want to be able to stand or sit comfortably and reach everything without having to bend over at all.
Also, make sure that you’re keeping all of your pieces away from the reach of small children and animals.
Step #2: Disassembly
Disassembling your gun means that you’re going to need to remove the magazine cap, barrel, fore-end, bolt carrier assembly, and trigger group.
You can do each of these through very simple processes.
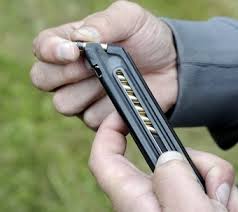
The first step is to simply unscrew the cap for the magazine by hand.
If you absolutely can’t remove it this way then place a cloth over the cap before using pliers and make sure to use only as much force as is absolutely necessary.
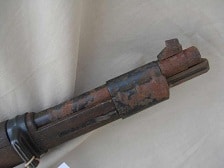
Next, you’ll simply take the barrel off, which will happen on its own when you take the cap off the magazine.
Your next step is to push the action bar lock toward the up position. This is going to allow you to pull back the fore-end and open up the action.
This process is a little more extensive because you’re then going to need to work from the bottom of the shotgun, pushing the metal strips out and then the carrier up.
This will give you the ability to reach into the receiver and push down the left shell latch.
Finally, you will be able to release the fore-end, which will allow you to slide it and the breech bolt assembly out.
The final aspect of disassembling your gun is to remove the trigger group, which only requires you to remove two simple pins in order to do it.
You want to avoid using anything metal to remove these pins because they are easily scratched, but you’ll be able to pull the entire trigger plate assembly off once you’ve removed the pins.
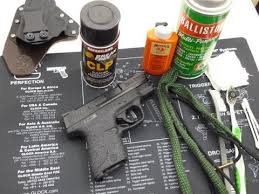
Step #3: Cleaning
Step 3 involves cleaning each of the components of your gun, starting with the barrel.
Here you’re going to use a solvent inside the barrel and use a bore snake as the best way to clean it of debris.
You’ll want to be careful to run the snake through more than once as you could get more dirt and debris each time.
When you clean the rest of the gun you can actually use solvent for both the inside and outside, which even includes the magazine tube.
You want to make sure you wipe these areas down completely to remove any solvent.
Finally, clean the trigger group, also with a solvent and make sure that you only use a small amount.
You can actually use 24027 Remington Accessories, Remington Oil, 10 oz. Aerosol,Multicolor, which is the recommended solution directly from Remington.
All you have to do is spray your trigger assembly and then let it all sit for approximately 15 minutes, following it up with another spray of the oil.
Let it dry, wipe it off and you’re done.
Step #4: Reassembly
The final stage of the process is putting your Remington 870 express gun back together. You would then work the entire process completely in reverse, starting with the trigger group.
You’ll lock the action bar under the left connector and insert the entire trigger plate assembly in. All you have to do is align the holes and then you’ll be able to put in the pins.
Then, you put the slide block assembly and breech bolt assembly back onto the action bars.
Make sure that you guide them in slowly and stop when you reach the right shell latch.
You’ll need to push up on the carrier and hold the right shell latch down in order to slide the fore-end back.
Next, press and hold the left shell latch so you can slide the fore-end back and push up the action bar lock.
You’ll then be able to slide the barrel back on and you’ll be ready to attach the magazine.
Just reassemble the magazine tube and put the cap over the spring. Screw it down by hand and you’re ready to go.
Remington 870 Disassembly & Reassembly
How To Clean and Lubricate A Remington 870?
Now when you have finished cleaning your Remington 870, you’re ready to hit the range once again with all the confidence.
Go ahead and fasten it to your shoulder to practice a few memorable shots.